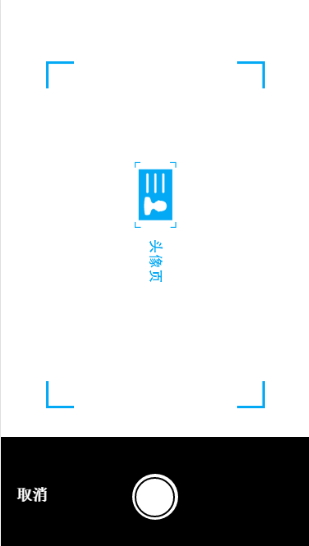
在使用APICloud進行開發時,我們有時會需要調用拍照功能,并且需要在定義相機UI界面,此時我們就需要想辦法怎樣能夠實現,在云控項目中我們需要在身份認證時,進行身份證認證的時候調用相機功能并且在相機界面上加上我們需要的UI元素,我們可以使用FNPhotograph模塊來實現我們想要的效果。

實現思路:
1.打開相機界面
2.一個自定義UI的frame頁面,背景透明,顯示在相機頁面上面
3.自定義frame層會擋住底部相機頁面(導致點擊、聚焦等功能沒法實現)
4.在自定義UI頁面上使用execScript調用相機頁面的方法
1.相機頁面:
          apiready = function(){
            // 監聽手機home鍵
            api.addEventListener({
                name: 'resume'
            }, function(ret, err) {
                // alert('按了Home鍵');
                // 重新打開相機
                test_closeCamera();
                if(flag==0){
                    test_openCameraView();
                }else if(flag==1){
                    test_openCameraView2();
                }else {
                    console.log('123');
                }

            });
      };

      // 2.openCameraView:打開純相機頁面(正面)
      function test_openCameraView(){
          flag=0;
          // console.log(flag);
          var FNPhotograph = api.require('FNPhotograph');
          FNPhotograph.openCameraView({
            rect: {
               x: 0,
               y: 0,
               w: api.frameWidth,
               h: api.frameHeight
            },
            orientation: 'portrait',
            fixedOn: api.frameName,
            fixed: true
          }, function(ret){
              window_idcard1();
              // 1.拍照后
              // if (ret && ret.eventType == 'takePhoto') {
              //     FNPhotograph.close();
              //     api.closeFrame({
              //         name: 'window_idcard.html'
              //     });
              //     alert('拍照成功,關閉當前相機');
              // }

          });
      }
      // 2.openCameraView:打開純相機頁面(反面)
      function test_openCameraView2(){
          flag=1;
          // console.log(flag);
          var FNPhotograph = api.require('FNPhotograph');
          FNPhotograph.openCameraView({
            rect: {
               x: 0,
               y: 0,
               w: api.frameWidth,
               h: api.frameHeight
            },
            orientation: 'portrait',
            fixedOn: api.frameName,
            fixed: true
          }, function(ret){
              window_idcard2();
         });
      }

      // 拍照
      function test_take(){
          var FNPhotograph = api.require('FNPhotograph');
          FNPhotograph.takePhoto({
            quality: 'high',
            path: 'fs://FNPhotograph/01.png',
            album: true
          }, function(ret){
            alert("拍照成功");
          });
      }

      // 對焦
      function test_focus(){
        var FNPhotograph = api.require('FNPhotograph');
        FNPhotograph.setFocusMode({
            focusMode: 'continue'
        });
        test_focusBox();
        test_focusRegion();
      }
      // 對焦提示框
      function test_focusBox(){
        var FNPhotograph = api.require('FNPhotograph');
        FNPhotograph.setFocusBox({
            box: {
                width: 1,
                color: '#ff0',
                maxSize: 100,
                minSize: 60
            }
        });
      }
      // 對焦焦點
      function test_focusRegion(){
          var FNPhotograph = api.require('FNPhotograph');
          FNPhotograph.setFocusRegion({
              region: {
                  x: api.frameWidth/2,
                  y: api.frameHeight/2.1,
                  w: 60,
                  h: 60
              },
              animation :true
          });
          // alert('對焦區域');
      }
      // 關閉相機(正面)
      function test_closeCamera(){
          var FNPhotograph = api.require('FNPhotograph');
          FNPhotograph.closeCameraView(
          function(ret) {
                  api.closeFrame({
                      name: 'frame_idcard1.html'
                  });
                  FNPhotograph.close();
                  // alert('關閉相機');
          });
      }
      // 關閉相機(正面)
      function test_closeCamera(){
          var FNPhotograph = api.require('FNPhotograph');
          FNPhotograph.closeCameraView(
          function(ret) {
                  api.closeFrame({
                      name: 'frame_idcard1.html'
                  });
                  api.closeFrame({
                      name: 'frame_idcard2.html'
                  });
                  FNPhotograph.close();
                  // alert('關閉相機');
          });
      }

      // 身份證認證遮蓋層(正面)
      function window_idcard1(){
          api.openFrame({
              name : 'frame_idcard1.html',
              url : './frame_idcard1.html',
              rect : {
                  x : 0,
                  y : 0,
                  w : 'auto',
                  h : 'auto'
              },
              bounces : false,
              bgColor : 'transparent',
              vScrollBarEnabled : true,
              hScrollBarEnabled : true
          });
      }
      // 身份證認證遮蓋層(反面)
      function window_idcard2(){
          api.openFrame({
              name : 'frame_idcard2.html',
              url : './frame_idcard2.html',
              rect : {
                  x : 0,
                  y : 0,
                  w : 'auto',
                  h : 'auto'
              },
              bounces : false,
              bgColor : 'transparent',
              vScrollBarEnabled : true,
              hScrollBarEnabled : true
          });
      }
2.自定義相機UI frame層
      // 點擊拍照
      function window_idcardBox(){
        var jsfun = 'test_take();';
        api.execScript({
          name: 'root',
          script: jsfun
        });

      }
      // 點擊圖片聚焦
      function window_frameImg(){
        var jsfun = 'test_focus();';
        api.execScript({
          name: 'root',
          script: jsfun
        });
      }

      // 關閉相機
      function window_close(){
        var jsfun = 'test_closeCamera();';
        api.execScript({
          name: 'root',
          script: jsfun
        });
      }
上一篇: 前端開發時配合CMS的一些小規范
下一篇: 百度地圖api的調用及自定義


